
Writing a Lightweight Markup Parser in Swift
The code in this post is available here in the form of a convenient Swift Package.
I recently had to write a lightweight markup parser to provide text formatting in our iOS app. The requirements were similar to those you can find in other rich communications apps:
- To emphasize words or sentences, the user can surround the text with *asterisks* to create bold text, or _underscores_ for italic text.
- To show corrections in the messages, users can surround the text with ~tildes~ to strike out the text.
- Users can combine formatting options.
So, the following text:
The *quick*, ~red~ brown fox jumps over a _*lazy dog*_.
should be formatted like this:
The quick, r̶e̶d̶ brown fox jumps over a lazy dog.
Another additional requirement is that intra-word formatting should not be allowed. For example, the following text:
Compute _6*4*8_. _Quick_zephyrs_blow_.
should be formatted like this:
Compute 6*4*8. Quick_zephyrs_blow.
I considered several options to implement the parser, including Parser Combinators, but in the end, I decided to write it from scratch. Doing so will give me full control over the performance.
We can break down the markup text formatting into the following steps:
- Tokenization, which is the process of breaking the input string into tokens (format delimiters and text).
- Parsing, which is the process of interpreting the tokens to generate an abstract representation of the formatted text.
- Rendering, which consists of converting the abstract representation into an
NSAttributedString.
Let’s go over the details for implementing each step.
Implementing a Tokenizer
Our markup format has three different kinds of tokens: text, left delimiter, and right delimiter. Each token should carry context information, e.g. the delimiter character or the actual text. Let’s create an enum to model that:
enum MarkupToken {
  case text(String)
  case leftDelimiter(UnicodeScalar)
  case rightDelimiter(UnicodeScalar)
}
The tokenizer’s job is to return a sequence of MarkupToken instances for a given string. For example, the following input:
_Hello *world*_
produces this sequence of tokens:
leftDelimiter("_")
text("Hello ")
leftDelimiter("*")
text("world")
rightDelimiter("*")
rightDelimiter("_")
The tokenizer will not check whether a left delimiter has a corresponding right delimiter. This tweak will help us to achieve linear time by avoiding backtracking. So, the parser can expect the following sequence of tokens:
text("Hello ")
leftDelimiter("*")
text("world")
However, the tokenizer can validate if a right delimiter has a corresponding left delimiter without incurring any performance cost, by maintaining a stack of the left delimiters processed so far.
The tokenizer interface is straightforward:
struct MarkupTokenizer {
  init(string: String)
  mutating func nextToken() -> MarkupToken?
}
It consists of an initializer that receives the input string and a mutating function that returns the next token or nil if there are no more tokens. The following code prints all the tokens found in "_Hello *world*_":
var tokenizer = MarkupTokenizer(string: "_Hello *world*_")
while let token = tokenizer.nextToken() {
  print(token)
}
Let’s have a closer look at the implementation of nextToken():
mutating func nextToken() -> MarkupToken? {
  guard let c = current else {
    return nil
  }

  var token: MarkupToken?

  if CharacterSet.delimiters.contains(c) {
    token = scan(delimiter: c)
  } else {
    token = scanText()
  }

  if token == nil {
    token = .text(String(c))
    advance()
  }

  return token
}
The method firstly gets the current character or exits if there are no more characters to process.
Then it checks if the current character is a delimiter character. Note that delimiters is a static property added via an extension with the value CharacterSet(charactersIn: "*_~").
The call to scan(delimiter:) scans for a left or right delimiter, considering the following rules:
- Left delimiters must be preceded by whitespace or punctuation and must not be followed by whitespace or newlines.
- Right delimiters must not be preceded by whitespace and must be followed by whitespace or punctuation.
If the call succeeds it will return the corresponding token and advance to the next character, otherwise, it will return nil.
The call to scanText() scans the string from the current position until it finds a delimiter character.
Finally, if a valid token has not yet been found, the method returns a text token containing the current character and advances to the next character in the string. This will handle those cases in which a delimiter character is found, but it should not be considered a delimiter (i.e. "Hello * world").
In case you are curious, you can have a look at the full implementation of MarkupTokenizer.
Implementing the Parser
The parser’s job is to generate a syntax tree from the sequence of tokens produced by the tokenizer. In our case, each node of the tree denotes the format for a particular part of the text.
For example, the following text:
The *quick*, ~red~ brown fox jumps over a _*lazy dog*_
Results in the following syntax tree:
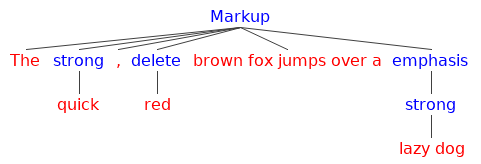
Swift enums with associated values are very well-suited for tree structures. Let’s create an enum for our markup nodes:
enum MarkupNode {
  case text(String)
  case strong([MarkupNode])
  case emphasis([MarkupNode])
  case delete([MarkupNode])
}
With this new type in place, we can say that the parser will produce the following array of elements for the previous text:
var elements: [MarkupNode] = [
  .text("The "),
  .strong([.text("quick")]),
  .text(", "),
  .delete([.text("red")]),
  .text(" brown fox jumps over a "),
  .emphasis([
    .strong([.text("lazy dog")])
  ])
]
Let’s see how we can turn a sequence of tokens into an array of MarkupNode instances.
We start by creating a MarkupParser struct with a single public class method that returns the array of nodes for an input text. It uses an internal tokenizer to iterate over the tokens and maintains a stack of the open format delimiters found so far:
public struct MarkupParser {
  public static func parse(text: String) -> [MarkupNode] {
    var parser = MarkupParser(text: text)
    return parser.parse()
  }

  private var tokenizer: MarkupTokenizer
  private var openingDelimiters: [UnicodeScalar] = []

  private init(text: String) {
    tokenizer = MarkupTokenizer(string: text)
  }

  private mutating func parse() -> [MarkupNode] {
    ...
  }
}
The private parse() method iterates over each token and inspects it. Text tokens are converted to text nodes and appended to the elements array:
mutating func parse() -> [MarkupNode] {
  var elements: [MarkupNode] = []

  while let token = tokenizer.nextToken() {
    switch token {
    case .text(let value):
      elements.append(.text(value))
      ...
    }
  }
  ...
  return elements
}
If the token is a left delimiter, it is added to the stack, and the following tokens are parsed recursively:
case .leftDelimiter(let delimiter):
  // Recursively parse all the tokens following the delimiter
  openingDelimiters.append(delimiter)
  elements.append(contentsOf: parse())
When the token is a right delimiter with a matching counterpart in the stack, we need to call close(delimiter:elements:). This method creates a node for the specified delimiter, adding the provided elements as children and removing the delimiter from the stack. It also converts all the open delimiters after that one to plain text, removing them from the stack. This logic is needed to handle input text like "Hello *_world*" correctly.
case .rightDelimiter(let delimiter) where openingDelimiters.contains(delimiter):
  let node = close(delimiter: delimiter, elements: elements)
  return [node]
The default case handles right delimiters without a matching left delimiter, converting them to text nodes.
default:
  elements.append(.text(token.description))
After going through all the tokens, we need to transform the remaining open delimiters to text nodes and prepend them to the array of resulting elements. This logic will handle input text like "Hello *world" correctly:
// Convert orphaned opening delimiters to plain text
let textElements: [MarkupNode] = openingDelimiters.map {
  .text(String($0))
}

elements.insert(contentsOf: textElements, at: 0)
openingDelimiters.removeAll()

return elements
There is a test case for the MarkupParser that covers most of the edge cases and also serves to document the specifics of the format.
Rendering Formatted Text
The last step to obtain the formatted text is to transform an array of nodes into an attributed string.
We start by creating a method that produces an NSAttributedString for a single MarkupNode. The render method receives an attributes dictionary, with at least one font attribute:
extension MarkupNode {
  func render(attributes: [NSAttributedStringKey: Any]) -> NSAttributedString {
    guard let currentFont = attributes[NSAttributedStringKey.font] as? UIFont else {
      fatalError("Missing font attribute in \(attributes)")
    }
    ...
  }
}
It then switches on the type of node. For the text case, we just need to return an NSAttributedString initialized with the associated text and the provided attributes:
switch self {
case .text(let value):
  return NSAttributedString(string: value, attributes: attributes)
  ...
}
The strong and emphasis cases require a little more work. We need to create a new font based on the current one, by adding the appropriate symbolic traits (bold and italic, respectively). To render the node, we map over the children, calling the render method with the new attributes, and finally joining the resulting attributed strings into a single one.
case .strong(let children):
  var newAttributes = attributes
  newAttributes[NSAttributedStringKey.font] = currentFont.addingSymbolicTraits(.traitBold)

  return children.map {
    $0.render(withAttributes: newAttributes)
  }.joined()

case .emphasis(let children):
  var newAttributes = attributes
  newAttributes[NSAttributedStringKey.font] = currentFont.addingSymbolicTraits(.traitItalic)
  return children.map {
    $0.render(withAttributes: newAttributes)
  }.joined()
For the delete case we use a similar approach, but instead of creating a new font, we just add a strike through style to achieve the desired effect:
case .delete(let children):
  var newAttributes = attributes
  newAttributes[NSAttributedStringKey.strikethroughStyle] = NSUnderlineStyle.styleSingle.rawValue
  newAttributes[NSAttributedStringKey.baselineOffset] = 0
  return children.map {
    $0.render(withAttributes: newAttributes)
  }.joined()
Now that we can convert nodes to attributed strings, we can create a MarkupRenderer class that takes a markup string and produces an attributed string:
public final class MarkupRenderer {
  private let baseFont: UIFont

  public init(baseFont: UIFont) {
    self.baseFont = baseFont
  }

  public func render(text: String) -> NSAttributedString {
    let elements = MarkupParser.parse(text: text)
    let attributes = [NSAttributedStringKey.font: baseFont]

    return elements.map {
      $0.render(withAttributes: attributes)
    }.joined()
  }
}
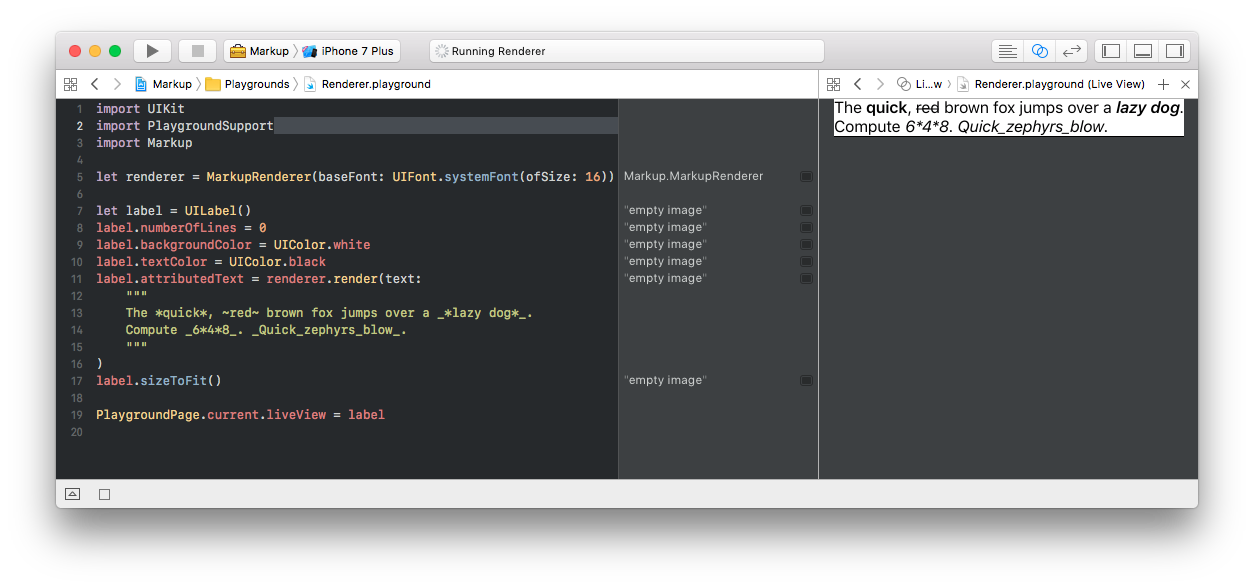
With all this in place, we finally have a nice way to use formatted text. For example, the snippet:
let renderer = MarkupRenderer(baseFont: UIFont.systemFont(ofSize: 16))
let label = UILabel()
label.numberOfLines = 0
label.backgroundColor = UIColor.white
label.textColor = UIColor.black
label.attributedText = renderer.render(text:
"""
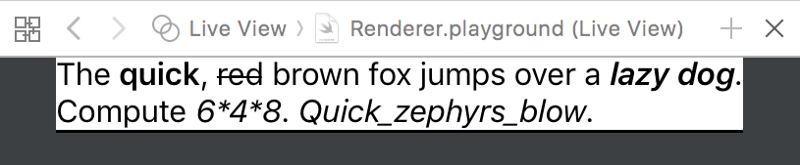
The *quick*, ~red~ brown fox jumps over a _*lazy dog*_.
Compute _6*4*8_. _Quick_zephyrs_blow_.
""")
produces the following output: